What you get
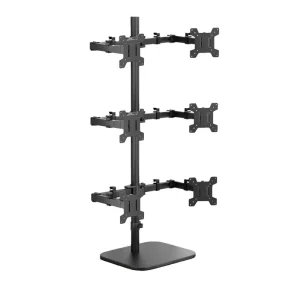
You get a clean six-display layout built around your laptop, using one structure instead of a pile of separate stands. If you are building a six screen mount setup for trading, research, or production work, this keeps screens aligned and your desk surface clearer.
This is a mount-only product. Laptop and monitors are not included.
A six screen mount like this is usually chosen when you want a true multi-monitor workstation layout, where charts, scanners, order entry, and comms can stay visible at the same time. It also fits a trading desk mount approach, where you keep screens at eye level and avoid monitor bases taking over the desk.
For matching parts, browse Desk Arms & Mounts, add leads from Cables & Connectivity, and choose video expanders in Docks & Adapters. If you still need screens, start in Screens & Monitors.
Why it fits a multi-monitor workstation
A multi-monitor workstation is not about showing off screens. It is about keeping your process consistent.
- Less visual clutter: one mount system instead of multiple bases
- Stable layout: screens stay in the same positions day to day
- Better viewing height: you can bring screens up to a more natural line of sight
- Trading desk workflow: charts, watchlists, news, and order tools can stay visible in a six screen mount layout
Some people do not need six screens every day. If your trading style is simple, fewer screens may be easier to manage. If you already know you are constantly rearranging windows mid-session, a six screen mount is likely the cleaner answer.
Choose your base type
Pick the base that matches your desk and how permanent you want the install to be.
- Clamp: fast desk-edge install with no drilling
- Grommet mount: bolt-through mounting for a clean install and strong hold
- Base plate: freestanding weighted base for desks where clamping or drilling is not a fit
If you want maximum rigidity, grommet mounting is usually the most stable option. If you move your setup often, the base plate can be easier to live with.
Compatibility checks
Before you commit to a six screen mount, do these checks first.
- Confirm your monitors use 75×75mm and 100×100mm mounting hole patterns
- Confirm each monitor weight is within the rated load for the arms on this mount
- Confirm desk thickness for clamp installs, or hole size and clearance for grommet installs
- If you are mixing screens, plan where the heavier monitors will sit before you tighten anything
If you are using lightweight portable screens, this can also support a portable monitor mount style setup, as long as the screens have the right mounting holes or the correct adapter.
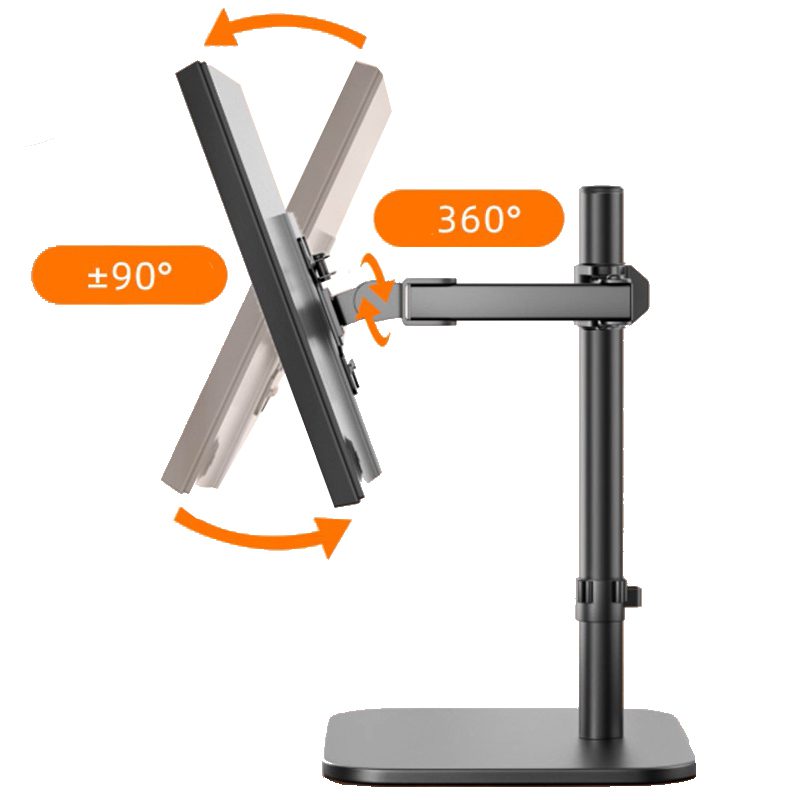
Adjustability and comfort
Each arm supports tilt, swivel, and rotation, so you can fine-tune angles and keep the layout balanced. With six screens, small changes matter. Even a slight inward angle on the outer displays can reduce head movement and make long sessions feel easier.
Example layout: keep your two primary charts in the center, keep scanners and watchlists on the left side, keep news and communication on the right side, then use the top screens for higher timeframe charts or account panels. That is a practical multi-monitor workstation layout that stays consistent.
Setup tips
- Install the base first, then build the center structure before you add the outer arms
- Mount the heaviest monitors closest to the center for better stability
- Route power and video leads before final tightening so cables do not pull on the arms
- Mount screens in stages, first two, then four, then six, so you can balance spacing as you go
- After the first day, recheck clamp tension or grommet tightness and tighten if needed
What’s included
- Six-screen mount structure (6-arm configuration)
- Base type selected at checkout (Clamp, Grommet mount, or Base plate)
- Standard mounting hardware
Note: monitors and laptop are not included.
Next step
Next step: confirm your monitors use 75×75mm and 100×100mm mounting hole patterns, choose your base type, then plan your cable runs before you lock the arms in place. If you are adding HDMI splitters or DisplayLink adapters to reach six screens, start in Docks & Adapters so your video plan matches the number of displays you want.